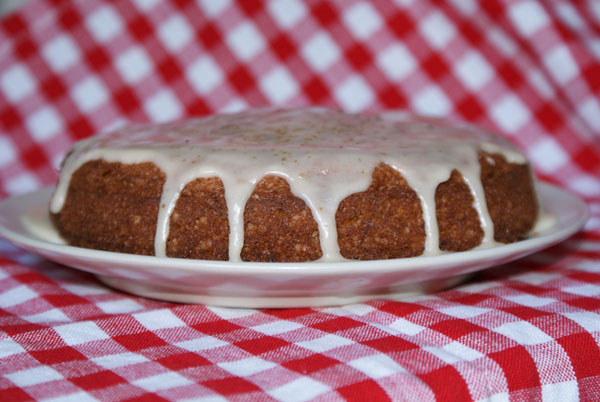
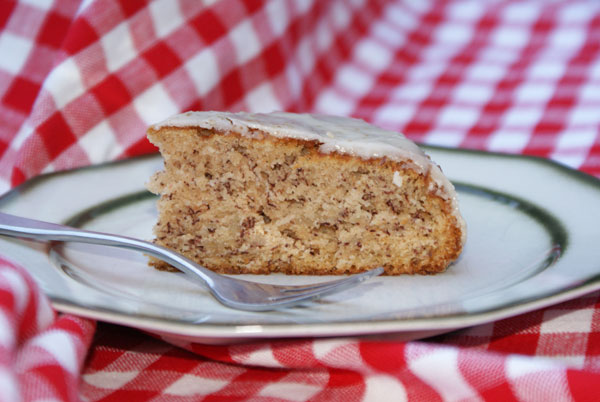
Banana Bread Cake for the (Monster) Munchies!

…super quick and easy!

I love cakes, cookies, cupcakes, everything sweet you can bake and since I have this little Blog here I enjoy making them almost every day. I have a long list of things I want to bake I haven’t tried yet and I am always curious how a new recipe turns out.

But sometimes I just have that little monster in me, knocking on my sweet tooth, saying feed me now!! Feed me with something really sweet and flavorful with a consistency you don’t want to stop chewing on….

Well, I am lactose intolerant and that means for me here in Germany, I can’t just go and get me a cake, a sweet bun, some cookies from the bakery, because nobody sells lactose free stuff…. so I hear that monster knocking and that means to me, let’s bake, quick!!

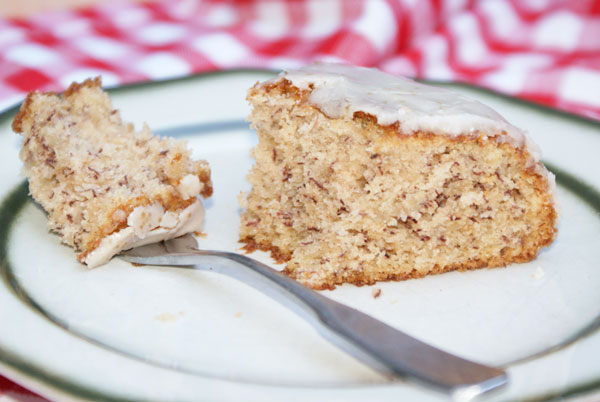
This banana cake was exactly what I needed.

The recipe is adapted from here.

Ingredients

  • 1 cup mashed bananas (about three)
  • 1 cup (200 g) sugar
  • 1/3 cup (80ml) vegetable oil
  • 2 eggs
  • 1 cup (120 g) flour
  • 1 teaspoon baking powder
  • 1/2 teaspoon baking soda
  • 1 teaspoon cinnamon
  • pinch of salt

Preheat oven to 350 and grease a 9 inch pan. Mash the bananas and mix in the sugar, oil, and eggs.
Stir in the flour, baking powder, baking soda, cinnamon, and salt. Pour into the pan and bake, uncovered, about 25 minutes, or until a toothpick comes out clean.

I made a sugar glaze with vanilla extract and sprinkled some brown sugar on top.

Can’t hear any monsters anymore, can you?

Linzer Cookies

crunchy nut crisp and in the middle your favorite jelly!

I always wanted to make those, because they look so pretty. I think I never even tried them before. There’s nuts in the dough. I like nuts. Sometimes the recipe calls for hazelnuts and almonds, sometimes walnuts. So I tried this one just with hazelnuts. The cinnamon in the recipe, which I got from here, let’s them turn out to be a perfect treat for fall and/or winter time.

Ingredients

  • 3 sticks (336 g) butter, room temperature
  • 1 1/4 cup (108 g) sugar
  • 1 cup (112 g) hazelnuts
  • 1/3 cup (56 g) almonds
  • 2 large eggs
  • 3 cups (420 g) flour
  • 2 teaspoons (7 g) cinnamon
  • 2 teaspoons (7 g) baking powder

powdered sugar to garnish the tops

You can either ground the nuts yourself with a food processor, or you buy them already ground.

In a bowl, mix the flour with the baking powder and the cinnamon. Set a side.
Cream the butter and the sugar together with an electric mixer until fluffy.
Add the ground nuts and then the eggs until incorporated. Wrap the dough in plastic foil and let chill in the fridge for at least 2 hours or overnight.

Preheat the oven to 350 degrees Fahrenheit (175 Celsius).

Roll out half of the dough on a floured surface about 1/8 inch thick (0,5cm). Pick the cookie cutter you like and you have a smaller one of it, too. Make the bottoms just with the bigger cookie cutter. The tops get their hole with the smaller one. Put them in the oven for 15 – 20 minutes.

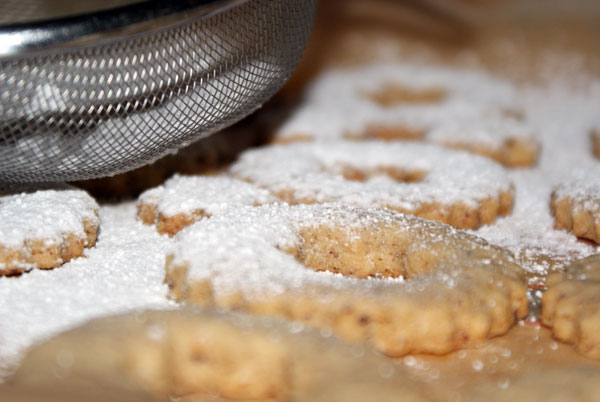
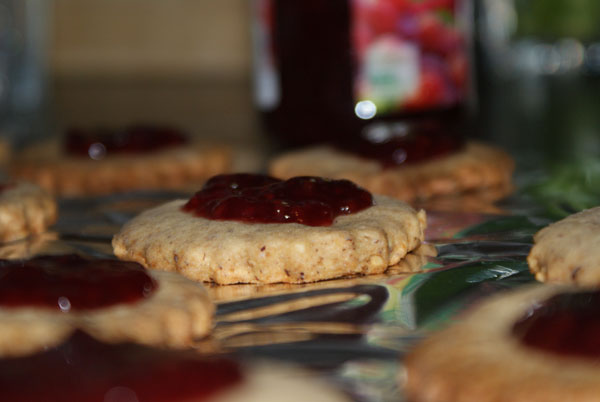
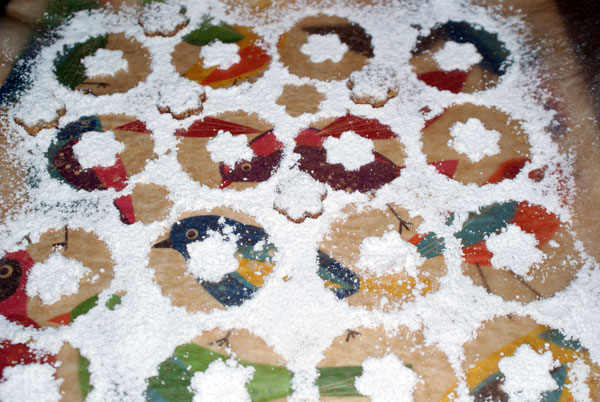
After cooling you scoop little rounds of jelly on the bottom sides with a spoon (be careful, not to use too much). Garnish the top sides with confectioner’s sugar and put them on the bottoms.

Bon Apetit!

Red Wine Cake

to start the Wine Festival!

Every year in August we have the wine festival going on downtown. That means all the wine growers sell their wine on a big festival with live music and food. You go there with your friends and sample the wine and eat and talk. Good times..

This cake is also a childhood memory. The Grandmother of my best friend would make it and I always loved it. I found the recipe here from Kristin Donnelly, Food and Wine and it’s definitely a good one. The cake is not too sweet and the balance between the chocolate and the red wine just perfect.

Chocolate Red Wine Cake

Ingredients

2 cups (240 g) flour
¾ cup cocoa powder
1 ¼ teaspoons baking soda
½ teaspoon salt
2 sticks (230 g) butter or lactose free margarine, softened
1 ¾ cups (350 g) sugar
2 large eggs
1 teaspoon pure vanilla extract
1 ¼ cups (300ml) dry red wine

This recipe is for a 12cup bound cake form, I did cut it in half and made a little one.
Preheat the oven to 350 degrees Fahrenheit (175 Celsius).

Mix together the flour, cocoa powder, baking soda and salt and set aside. Beat the butter and the sugar with an electric mixer until fluffy. Add the eggs, one at a time, and the Vanilla. Then alternately mix in the flour and the wine until incorporated.

Fill the batter in a greased and floured pan and bake for 45 minutes. Don’t forget to make the toothpick test.
Let cool on a rack and dust with confectioner’s sugar before serving.

I had a great girls night out on the festival this year, we sampled some sparkling wine, they all were delicious…of course

When Blueberries meet Poppyseeds…

then it makes the crust appear extra crunchy with every bite you take.

Blueberries are everywhere and I just got my new mini tart forms. And since it’s not long ago that I made apple pie I needed something different for the crust. Brainstorming. Blueberries, heat them up with brown sugar, cinnamon just a small pinch…lemon juice..Lemon!! Lemon zest in the crust, poppy seeds and more brown sugar. Perfect.


Taking a Billion of pictures to get you as close as I can get you in here. You can klick the little ones to open up.
The recipe is made from scratch and turned out delicious. It wasn’t too sweet, I would almost say next time I add two more tablespoons of sugar to the blueberries.

Is it getting mouthwatering yet? Can you smell the blueberries cooking with the sugar and the fresh lemon zest waiting to combine with the rest of the dough?
I did split one with my daughter when it was still warm on the balcony after lunch. We were sitting on the floor giggling, enjoying, taking pictures…

And at this point I should mention, that these pictures are not taken with my normal digital camera. A good friend of mine borrowed me his to try it out how it is to be able to make really fancy, close, macro pictures of food.

And after getting a little frustrated, that it didn’t work out to well with the first attempts, I have to admit, today was really fun. Fun, fun fun fun. I want one. Ha!

The problem when you have such a fancy camera and you take a lot of pictures is, the selection after wards. Oh my..

But for this post it seems, I made the right decision. One picture became the first accepted I submitted on foodgawker. That makes me really proud!

Tart/Pie crust

Makes 4 little (mini) Tarts.

Ingredients

  • 1 1/4 cup (150 g) flour
  • 1/4 teaspoon salt
  • 2 tablespoons brown sugar
  • 1 tablespoon poppy seeds
  • 1/2 cup (115 g) butter or lactose free margarine
  • 1-3 tablespoons (ice) cold water
  • zest of one lemon

In a large bowl you mix all the dry ingredients together. Then add the butter and either use an electric mixer or (like I do) just use your hands to rub the butter in the flour mix. Add as the last step, tablespoon by tablespoon the cold water ( I just needed 1) and knead the dough just so it comes and stays together.Form a disk and rap in foil. Let chill in the fridge for at least 1 hour. You can also leave it overnight.

Meanwhile chilling you can prepare the blueberries.

I had about a pound (500 g) of blueberries and brought them to boil in a saucepan with

  • 2 tablespoons of brown sugar (like I mentioned, maybe 2 tablespoons more)
  • 2 tablespoons lemon juice
  • 1/4 teaspoon cinnamon
  • 1 tablespoon corn starch

After they started boiling, I reduced the heat and let them simmer for 10 Minutes, till they thickened up a little.

Preheat the oven to 350 degrees Fahrenheit (175 Celsius).

On a floured surface, roll the dough out about 0,2 inch (0,5cm) thick. Fill your forms with the dough and  poke holes in the bottom with a fork. Place the cooked and chilled blueberries on top. Decorate the top with the rest of the dough like you prefer.

Put them in the oven for 20-25 Minutes until the edges of the crust become golden brown. *

*I always have the problem with with fruit fillings that they start to cook and bubble so some of it runs out of the forms, to prevent a big burning smelling mess in your oven, just put a baking paper on the ground of the oven.
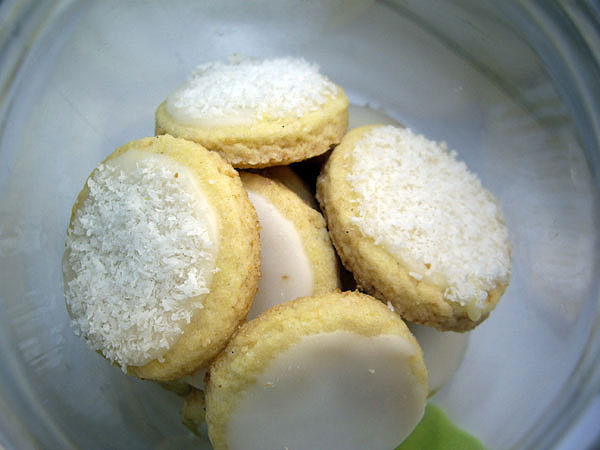
Coconut Lemon Shortbread, get ready for a chewy freshness you can’t stop eating

That cookie taste like a day off at the beach. Like summer.

I made them when it was so hot outside, that we didn’t want to go somewhere. Our apartment was cooler then outside (without air condition). And jep, I can still bake even the world is already an oven. I am baking crazy.

The recipe is adapted from gimme some oven and it was originally with lime and not lemon.
I just didn’t have lime at home, but tons of fresh lemon. So I decided to give it a try with the lemon. I bet they are delicious with lime, too. I will definitely try it next time. The recipe also calls for toasted coconut, which is easy to do but I skipped it. I also didn’t use a food processor, simply just because I don’t have one.

Coconut Lemon Shortbread

Ingredients:

  • 1/2 cup (35 g) flaked coconut
  • 1/2 cup (100 g) sugar
  • 2 Tbsp. lemon peel
  • 1 tsp. vanilla
  • 2 1/2 cups (280 g) flour
  • 1 cup (115 g) cold butter or lactose free margarine, cut into pieces

Preheat the oven to 325 degrees Fahrenheit (162 Cesius). Line a baking sheet with parchment paper.

Mix the coconut and the sugar with the lemon peel and the flour. Add the Vanilla and the butter and (so did I) just use your hands to knead everything together. Knead until smooth.

On a floured surface, roll out the dough about 1/4 inch (0,5cm) thick. Use a cookie cutter of your choice. Bake for 15 Minutes or until the bottom gets slightly brown. Transfer to a wire wrack and let cool.

Lemon Glaze

Ingredients:

  • 2 cups powdered sugar
  • 1 tsp. lime peel
  • 1 Tbsp. lime juice
  • 2 to 3 Tbsp. water

Mix all the ingredients in a small bowl together and spread on cookies. Sprinkle some coconut if desired.

Red Velvet Cupcakes or Cakes. Probably the best treat for your happy soul.

Sunday baking. Oh, I love it!

I make (red) velvet cakes or cupcakes when I feel good, I don’t need them to make me feel good. (Red) velvet cake is there to make you think, how good life is, because you can enjoy a velvety treat. Does that make any sense? Do I sound high? Maybe I still am… Velvet high.

I tried a couple times to make the red velvet cake red, but unfortunately the red food coloring I use does not do it’s job good enough, so they always turn brown. I also tried beet juice to color them and that turned into being my tasting secret. They were so yummy that I would never skip adding the juice anymore (just instead of the food coloring).

The recipe for the cupcakes is adapted from The Cake Mistress . I usually do a normal butter cream frosting and add some almond extract to it. And again I have to write that sentence. Nobody knows red velvet cake here in Germany. So a lot of people get all amazed by that new flavor they experience.

(Red) Velvet Cupcakes

Ingredients

  • 1/4 cup (60 g) Butter or lactose free margarine, room temp
  • 3/4 cup (150 g) Sugar
  • 1 large Egg, lightly beaten
  • 10 g Cocoa Powder
  • 20 ml Red Food coloring, gel/paste, or red beet juice
  • 1/2 teaspoon Vanilla Extract
  • 1/2 cup (120 ml) Buttermilk or Soy Milk
  • 1 1/4 cup (150 g) Flour
  • 1/2 teaspoon Salt
  • 1/2 teaspoon baking soda
  • 1 1/2 teaspoon White wine Vinegar

Preheat the oven to 330 degrees Fahrenheit (170 Celsius) . Line a 12-hole cupcake tin with paper forms.
Place butter and sugar in a medium bowl and beat with an electric mixer until light and fluffy. Slowly add the egg and beat until everything is well mixed.
In a small bowl, mix the food coloring, cocoa powder and vanilla extract until it makes a thick paste.
Add the paste or beet juice to the butter mixture and beat until the color is mixed through the batter.
On slow speed, slowly add half the buttermilk or soy milk until well mixed then add half the flour until well mixed. Repeat for the remaining milk and flour, beating until the mixture is smooth.
Add the salt, baking soda and vinegar, turning up the speed and beating for a couple more minutes.
Fill the paper forms about two-thirds full. Bake for 20-25 minutes (a tooth pick should come out clean).

Of course, you can also just fill the batter in a small cake form, like I did for the 4th of July!

Apple Pie

Like I mentioned a few posts before I feel like early fall. It’s not cold, but it’s very fresh in the mornings and evenings. And that makes me want something warm and heavy…. like a fresh apple pie! Warm apples, cinnamon and a crunchy crust. The recipe for the crust is from Cynthia Barcomi’s Baking Book. I just made some additions in the amount of sugar and I did cut the recipe in half because I was just using a 4,5 inch (12cm) pie form.

Recipe for the pie crust (by Cynthia Barcomi)

Ingredients

1 3/4 cup (210 g) all purpose flour

1/2 teaspoon salt

2 Tablespoons sugar

2 Tablespoons brown sugar

1/2 cup (120 g) butter or lactose free margarine

1/4 cup (45 g Palmfett) shortening

1/3 cup (80 ml) cold water

In a big bowl mix the flour, salt and sugars. Cut the butter and the shortening in small pieces and mix it with an electric mixer in the dry ingredients until you have little crumbs. Add the water (which should be really really ice cold) and knead the dough with your hands together, form a disk and chill in the fridge for about 2 hours.

Filling

I used 2 big “Jonagold” apples but I guess it’s always up to yourself which apple you prefer for your pie.

1/3 cup (60 g) brown sugar

2 tablespoons Vanilla sugar

2 tablespoons flour

2 tablespoon fresh lemon juice

1 tablespoon Maple Sirup (Ahornsirup oder Grafschafter Goldsaft)

Peel and cut the apples in pieces or slices. In a bowl mix them well with the rest of the ingredients.

Preheat the oven to 410 degrees Fahrenheit (210 Celsius)

After chilling, you half the dough in two pieces and roll it out about 0,2 inch (0,5 cm) thick and cover the bottom and the sides of your pie form. Put the filling on top. Roll out the other half of the dough and either cover it completely and cut decorative slices, or you take a cookie cuter of your choice, like me the hearts and decorate.

Put the pie in the oven. After 15 Minutes turn the heat down to 375 (190) and cover the pie with aluminum foil. Bake for another 50 minutes. The pie crust should be golden brown.

(Happy) Sugar Donut Mini Muffin , or the failed Millionaire’s Shortbread

Don’t they look simply perfect? There is not much to it, no cream, no icing, frosting, sprinkles, just a simple sugar cover. But sometimes it’s the simple things in life that make us happy, isn’t it? Happy happy sugar!

Today is a reopening of a kids second hand clothing store in our neighborhood, which also has environmentally friendly clothes for kids and baby’s.
I thought I could bring a millionaire’s shortbread I was baking till midnight last night. For all of you who don’t know what that is. It’s a shortbread crust with a caramel (dulce de leche) layer and chocolate on top. I never made it before, but it didn’t look too difficult to me. So unfortunately it turned out to fall apart before you’re even able to stick it in your mouth… it tastes delicious, but that’s all. I haven’t been so lucky with making shortbread lately. I think I haven’t found the right butter substitute for it yet.

Enough for the shortbread. I always wanted to make this little cutie donuts muffins. And it’s a quick recipe.
You don’t even need an electric mixer.

The recipe is from CaffeIna

Sugar Donut Muffins

(makes about 30 mini sized Muffins)

Ingredients

170 gr (6 oz or 3/4 cup) sugar
1 large egg
340 gr (12 oz or 1 1/2 cups) all purpose flour
10 gr (2 tsp) baking power
1 pinch (1/4 tsp) salt
1 pinch (1/4 tsp) ground nutmeg
60 ml (2 fl oz or 1/4 cup) vegetable oil
180 ml (6 fl oz or 3/4 cup) milk or soy milk
5 gr (1 tsp) vanilla extract

28 gr (2 tbsp) butter or lactose free margarine, melted
115 gr (4 oz or 1/2 cup) sugar, for rolling

Preheat oven to 350F and grease a muffin pan.

In a large bowl, beat together sugar and egg until creamy.

In a small bowl, whisk together flour, baking powder, salt and nutmeg. Add the dry ingredients into the egg mixture and stir. Finally, pour in the vegetable oil, the milk and the vanilla extract.

Pour the batter into the muffin cups and bake for 15-18 minutes.

Because I made them in mini size they just needed 10 minutes.

While the muffins are baking, melt the butter and pour remaining sugar into a small bowl.

When muffins are done, lightly brush the top of each with some melted butter, remove from the pan and roll in sugar. Cool on a wire rack.

Thanks for reading, we’re off to the party now 🙂

Lemon curd + Strawberries = Love

I found out, that there is either the lemon curd lover or the hater, not much in between. But if you put the curd  on a cake with some fruits on top you totally win, always. Especially between a crunchy tart crust and fresh strawberries.

I have to admit that I didn’t even know that there is a lemon curd existing till I found it accidentally on the web by browsing recipes. So far I know it’s not a German thing. I totally fell in love with the first second I started making it. And my first try was a microwave recipe, which I still think works fine.

Lemon Curd

(adapted from here)

Ingredients

1 cup (200g) white sugar
3 eggs
1 cup(240ml) fresh lemon juice
3 lemons, zested
1/2 cup (115g) unsalted butter or lactose free margarine, melted

In a microwave-safe bowl, whisk together the sugar and eggs until smooth. Stir in lemon juice, lemon zest and butter. Cook in the microwave for one minute intervals, stirring after each minute until the mixture is thick enough to coat the back of a metal spoon. Remove from the microwave, and pour into small sterile jars. Store for up to three weeks in the refrigerator.

One thing I want to add, is that I always press the lemon curd through a sieve, to get out the little egg white pieces which always happen when I make it.

Tartcrust

Ingredients

1/2 cup (100g) sugar
3/4 cup plus 1 1/2 tablespoon (200g) cold butter or lactose free margarine
2 3/4 cups flour (300g)
1 egg
pinch of salt

Mix the flour with the salt and set aside.

Cut the cold butter in cubes and mix together with the sugar and the egg. I prefer to use my hands, but you can use your electric mixer, too. Add the flour and knead the dough with your hands until well combined. Form a disk, cover with plastic foil and let chill in the fridge for about half an our.

Preheat the oven to 350 degrees Fahrenheit (175 Celsius).

Roll out the dough on a floured surface and make it fit into your greased 9 inch baking pan. Make lines of holes in the dough with a fork. Let bake for about 25 Minutes or until golden brown.

When the tart crust is completely cooled, you spread the top with the lemon curd, I always do like 1/2 inch (1cm) thick. Then arrange the fresh strawberries on the tart. I added some blueberries and sprinkled almond sticks between the fruits.

A fresh summer treat.

A cream puff is a cream puff or a Windbeutel, a Profiterole, a choux à la crème

It’s been raining for days, almost seems like early fall outside, even though it’s the middle of summer.
So every time it get’s rainy and cold outside my craving goes to heavy stuff. Savory food like meat and sauce and potatoes. And the sweet tooth asks for heavy cream. But it’s still summer! So I made a compromise and made my first cream puffs ever.

They are so light and fluffy like a cloud melting on your tongue, filled with sugary creamy goodness…
I always thought to making these would be hard. I mean, how can you bake something that raises up in the oven that a forms a hole?
The answer after I tried it is, yes you can! And it’s so easy that I asked myself why haven’t I tried this before? I missed cream puffs for so many years, because I couldn’t eat them. Now I am in heaven!

I substituted the butter in the cream puffs with lactose free margarine. And for the filling I made a Vanilla pastry cream with soy milk instead of milk and using margarine again.

Since a cream puff filling should be really milky creamy I used some lactose free cow milk whip cream which you can buy here in Germany in almost every grocery store.

It turns out, that all you have to do to make them is,  whisk , whisk and whisk till your arm hurts, but it’s totally worth it.

Preheat the oven to 400 degrees Fahrenheit (200 Celsius)

For the batter you need: (makes about two dozen mini cream puffs)

1 cup water (250ml)

1/2 cup butter or lactose free margarine (115 gr.)

1/4 teaspoon salt

1 cup flour (120gr)

4 eggs

Mix the flour with salt. Bring water and butter to boil. When the butter is melted you dump the flour all at once in the boiling water. Stir and cook till it forms a ball and doesn’t fall apart. Transfer the dough to a bowl and add always only one egg and mix it in, still beating with a wooden spoon, completely before you do the next egg.

Now you can either use a pastry bag with a round tip or just a tea- or tablespoon. I used the spoon. And make little rounds of dough on the baking sheet with parchment paper, separated from each other about one inch (2,5cm).

It takes the mini ones I made about 17 Minutes. They should be all puffy and golden brown.